
I’ve navigated the NYC subway guide countless times—understanding its 472 stations, 24 lines, and the rhythm of rush hour crowds. The first time was disorienting: announcements barely registering through the screech of wheels on steel. But after a few rides, something clicks. You learn to read the map. You know which line gets you where fastest. You understand that the crowding at 8am is just part of navigating the system, not a reason to panic.
The subway is the backbone of New York. It’s how you move from Times Square to Brooklyn, from your hotel to the Lower East Side, from Central Park to the Financial District. Master it, and New York becomes navigable. Avoid it, and you’ll overpay for taxis and lose time to traffic.
This guide walks you through how to use the system, which lines matter for tourists, and the moves that separate visitors from people who actually know the city.
Quick Facts at a Glance
The subway is straightforward: it runs 24/7, reaches 472 stations across four boroughs, and costs $2.90 per ride. But here’s what actually matters for your trip.
Best Investment: 7-Day Unlimited Pass
$33 for unlimited subway and bus rides across a calendar week. Pays for itself after 12 rides (at $2.90 each). If you’re staying 3+ days and exploring, this is non-negotiable.
Single Ride
$2.90
Subway or local bus
Service Hours
24/7
Reduced service 10pm–5am
Payment Method
OMNY or MetroCard
Tap card or plastic card
Total Reach
472 Stations
Across four boroughs
Five Ways to Move Through New York
Most visitors use one or two of these. The smartest ones use the subway for most journeys.
The Subway
472 stations, 24-hour service, $2.90 per ride. It’s the backbone. Fast, reliable, crowded during rush hours, but honest. You know exactly what you’re getting. This is how you move across the city.
Walking
New York is walkable. Most neighborhoods are adjacent. Walking lets you notice things: street art, small cafés, local spots you’d miss on the subway. The distance from Times Square to SoHo is walkable (20–30 minutes) if you have the time and energy.
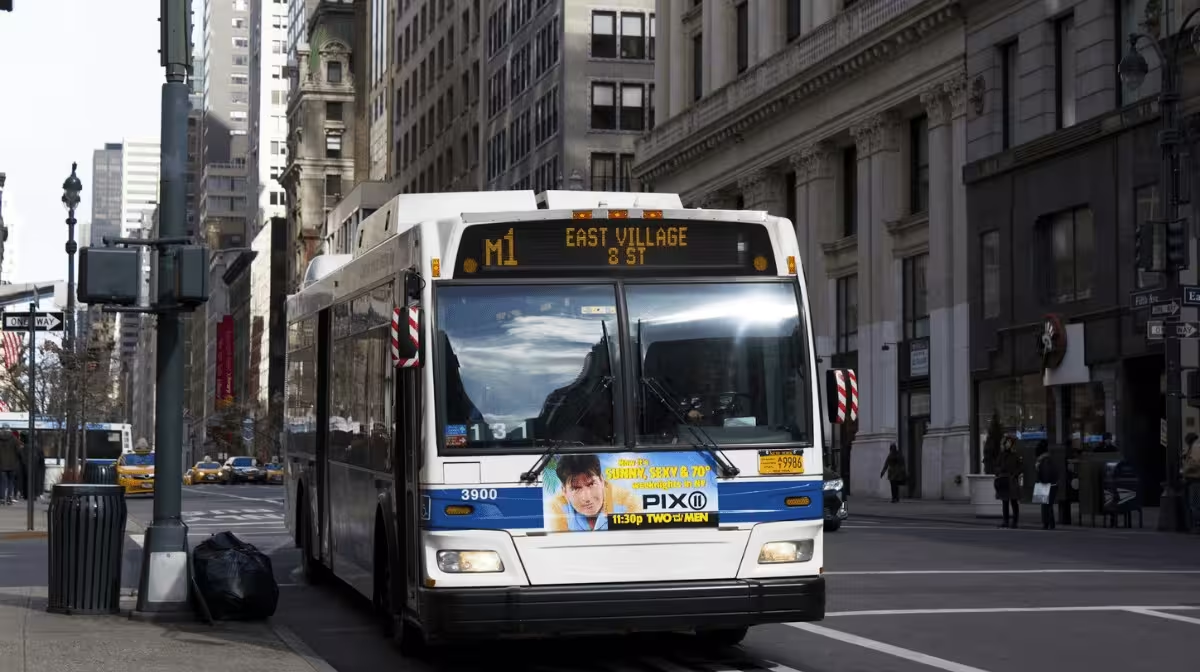
Buses
Same fare as subway. Better if you want to see the city while moving. Slower than the subway but you watch Manhattan change block by block. Routes numbered by borough (M for Manhattan, B for Brooklyn, Q for Queens, Bx for the Bronx, S for Staten Island).
Yellow Cabs
Hail from the street. Meter starts at $2.50 plus $2.50 per mile. Tip 15–20%. Useful for late night when the subway feels risky, or when you’re dragging luggage. Expensive for regular use.

Rideshare
Uber and Lyft work but surge pricing during rush hour makes them expensive. A $10 subway ride becomes $40 in surge pricing. Use for late night or when genuinely unsure of direction.
Pre-Arranged Private Transfer (From Airports)
Coming to New York with luggage? A pre-arranged private transfer picks you up at baggage claim and takes you directly to your hotel or destination in Manhattan. No AirTrain navigation, no connections, no surge pricing—flat rate the entire way.
Tired? Have luggage? Worth the convenience.
Pre-arranged transfers are $40–80 depending on your airport and destination. A driver meets you at baggage claim with your name on a sign. You avoid the AirTrain entirely.
Book Private Airport TransferDIY Public Transit (Budget Alternative):
From LaGuardia (LGA): AirTrain + LIRR to Penn Station (~45 min, $13). Works if you’re comfortable with connections and have minimal luggage.
From JFK: AirTrain + Jamaica Station + subway (~60 min, $8). Cheapest option but most connections. Good if you’re patient and have light luggage.
From Newark (EWR): Train to Penn Station (~30 min, $15). Most straightforward public transit option. Direct train, no AirTrain confusion.
Passes and Fares: The Math
Choose based on how many trips you’ll make during your stay. The decision is simple if you think about it.
Recommended for Most Tourists
7-Day Unlimited
$33 for unlimited subway and bus rides across a calendar week. Pays for itself after 12 rides (at $2.90 each). If you’re staying 3+ days and exploring multiple neighborhoods, this is the smart choice.
Best for 3–7 day trips
Other Options:
Pay-Per-Ride (OMNY)
$2.90
Per single ride. Good if you’re staying 1–2 days or using the subway sparingly. Just tap your credit card at the turnstile.
30-Day Unlimited
$127
Full calendar month. Only makes sense if you’re in New York for an extended stay or relocating temporarily.
OMNY (One Metro New York) is the new standard—tap your credit card, debit card, or phone. No MetroCard needed. It’s faster than fumbling with a plastic card.
How the Subway System Works
The NYC subway has 24 lines organized by number (1–7) and letter (A–Z). Understanding the structure helps you navigate efficiently.
Line Types
Local Lines stop at every station. Slower but comprehensive. The 1, A, and F are local lines. Good if you don’t want to miss a stop.
Express Lines skip stations to move faster. The 2, 3, and 5 run express in some sections. You’ll save 15–20 minutes on longer trips, but you miss stops in between.
Shuttles connect major hubs. The S shuttle between Times Square and Grand Central is famous but only 3 stops. A critical transfer point.
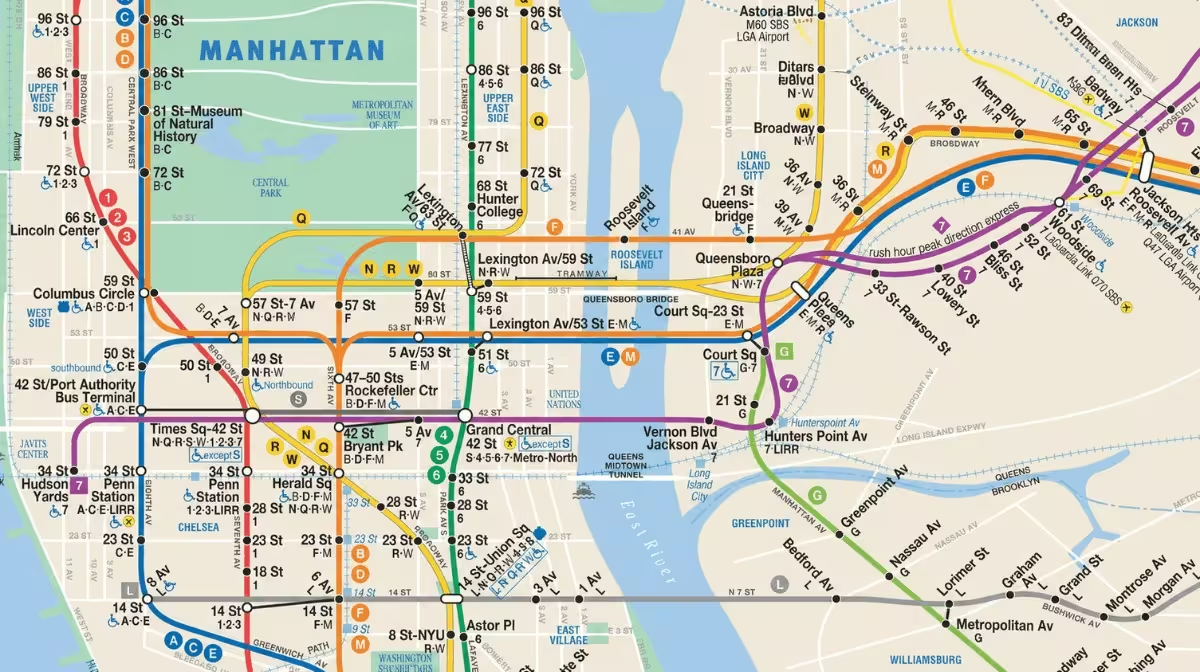
Reading the Map
Get the official MTA map. On it, you’ll see lines color-coded. Numbers (1–7) run north-south; letters (A–Z) run crosstown or outer-borough routes. Circle symbols mark local stops; diamond symbols mark express stops. Transfer points (where lines overlap) are your lifelines.
Always check service changes before you travel. The MTA updates frequently for weekends, nights, and maintenance. Google Maps and the MTA app show current status in real-time.
Major Transfer Hubs
These stations are your lifelines. They connect multiple lines, making them ideal for changing routes or getting oriented.
Times Square–42nd St
A, C, E, 1, 2, 3, S
The epicenter of tourist New York. This hub gets you to Theater District, Broadway, Midtown shops, and the bright chaos of Times Square itself. Most crowded but most central.
Grand Central–42nd St
4, 5, 6, 7, S
Your gateway to the Upper East Side, museums, and commuter rail connections. Grand Central itself is worth exploring—the architecture is stunning, and the terminal has excellent food options.
Union Square–14th St
1, 2, 3, 4, 5, 6, L
Major hub for reaching the East Village, Gramercy Park, and downtown connections. The surrounding neighborhood is worth exploring—cafés, bookstores, street vendors, genuine local vibe.
Fulton St
2, 3, 4, 5, A, C, J, Z
The hub for Wall Street, the Financial District, and South Street Seaport. If you’re doing historic New York or waterfront exploration, you’ll likely pass through here.
Canal St
1, 2, 3, 6, A, C, J, Z
The crossroads of Chinatown, SoHo, and the Lower East Side. This is where neighborhoods blur together. Perfect for food exploration and wandering.
How to Use the Subway: Step by Step
Step One: Get a Pass
If you’re staying 3+ days, go to any station and ask for a 7-Day Unlimited MetroCard. Cost $33. Done. Don’t buy from machines—they’re frustratingly slow. The booths exist for a reason. Or use OMNY: just tap your credit card at the turnstile when you enter. No purchase needed beforehand.
Step Two: Find Your Line
Use Google Maps. Download the NYC map before you arrive—it works offline, which matters because subway reception is spotty. Tell Google where you’re going. It shows you which line(s) to take and current service alerts.
Step Three: Enter the Station
Tap your card or MetroCard at the turnstile. Wait for the gate to open. Keep moving—don’t stand in the entryway.
Step Four: Wait on the Platform
Stand behind the yellow line. Trains come fast. On local lines, not all trains stop at every track, so look at the lights above the rails—they indicate which line uses that track. If you see a light above track 1, trains on that track are coming soon.
Step Five: Board
Doors open automatically. Get on. Priority seating exists for elderly passengers, pregnant women, and people with disabilities. Give up your seat if you see someone who needs it. Expect crowding during 8–9am and 5–7pm.
Step Six: Know Your Stop
The intercom announcements are often hard to hear. Use Google Maps or watch the digital display inside the car—it usually shows the next station. Station names are also posted on walls and doors. Don’t zone out.
Step Seven: Exit
Doors open. Push if they’re slow. You’re done.
Key Subway Lines for Tourists
The 1, 2, 3 (Red Line)
Runs north-south through Manhattan. The 1 is local; the 2 and 3 are express. Route: South Ferry (Battery Park) through City Hall, Times Square, Central Park West, Upper West Side to the Bronx. Use these for Battery Park (Statue of Liberty ferry), Wall Street, Times Square, Central Park. The 1 is slow but comprehensive; the 2 and 3 will get you there faster.
The 4, 5, 6 (Green Line)
Runs along the east side of Manhattan. The 4 and 5 run express in certain sections; the 6 is always local. Route: Brooklyn Bridge–City Hall through Fulton, Wall Street, Union Square, Grand Central, Lexington Ave, Upper East Side to the Bronx. Use these for Brooklyn Bridge, the Financial District, Grand Central, the Metropolitan Museum of Art.
The A, C, E (Blue Line)
Crosstown and north-south routes. The A runs to Far Rockaway; C and E serve Midtown. Use these for Brooklyn Bridge, SoHo, Times Square, Central Park, outer Brooklyn neighborhoods.
The F, M (Orange Line)
F runs north-south through Brooklyn and Manhattan; M runs crosstown through lower Manhattan. Use these for Washington Square Park, SoHo, Brooklyn Museum access, Astoria in Queens.
The L (Crosstown)
East-west line through lower Manhattan. Runs 24/7 without service changes. Route: 8th Ave to Union Square to 1st Ave. Use this if you’re moving between the east and west sides of lower Manhattan and don’t care about express speed.
Buses
Buses move slower than the subway but let you see the city. The best buses are the ones that run along the neighborhoods you want to explore. Route numbers tell you where they go: M routes in Manhattan, B in Brooklyn, Q in Queens, Bx in the Bronx, S in Staten Island.
To use a bus: find the stop, board at the front, tap your card, and either announce your stop or press the cord when you get close. You can transfer free between bus and subway within 2 hours if you use OMNY or MetroCard.
Best buses for tourists: The M5 along Fifth Avenue (connects financial district to Central Park), the M20 crosstown through Central Park, the M42 across 42nd Street through Times Square. These help you understand Manhattan’s geography.
Apps and Tools You’ll Need
Google Maps
Download the NYC map before you arrive. Works offline and shows you every route option, real-time train arrivals, and service alerts. Essential app.
MTA Official App
Shows live service status and planned service changes. Use this to check if your line has delays or weekend closures before you head out.
Citymapper
Shows all transit modes (subway, bus, bikeshare, walking). More intuitive for some people than Google Maps. Good for comparing route options to the same destination.
Safety, Etiquette, and What You Should Know
What You Should Know About Safety
The NYC subway is generally safe, but it has petty crime. Keep bags close. Don’t flash expensive electronics. Avoid eye contact with aggressive panhandlers. Trust your gut about the car you’re in—if something feels off, move to a different car.
Late night (10pm–5am): Ride in the middle car where the conductor sits. Service is less frequent and some lines run reduced schedules. Avoid empty cars. Rush hour (8–9am, 5–7pm): Expect crowds and slower movement. If you’re dragging luggage, avoid these times.
Unwritten Rules
Priority Seating: The first rows and end cars have priority seating. If you’re young and able, give up your seat for elderly passengers, pregnant women, or people with disabilities. It’s not written anywhere, but New Yorkers observe it.
Backpacks: In crowded cars, hold your backpack in front of you or remove it. You’ll hit people otherwise.
Standing: Hold a pole. Trains stop suddenly. Let people exit before you board.
What Not to Do: Don’t spread your legs across two seats (manspreading is hated). Don’t eat smelly food. Don’t play music without headphones. Don’t block doors. You’ll get looks if you break these rules—New Yorkers will judge you silently but thoroughly.
Common Questions Answered
- Can I use my credit card directly on the turnstile?
- Yes. OMNY readers accept any contactless payment—credit card, debit card, Apple Pay, Google Pay. No MetroCard needed.
- Do I need to buy passes in advance?
- No. Buy at any station using the booth or machine. Or just tap OMNY and pay-per-ride at turnstiles.
- What if I get on the wrong train?
- Get off at the next stop and reverse direction. You don’t pay again. Use Google Maps to verify the correct line and try again.
- Are there bathrooms on the subway?
- No. Plan accordingly. Some stations have restrooms, but rely on coffee shops, hotels, and restaurants. Most will let you use the bathroom if you ask.
- Can I take luggage on the subway?
- Yes, but avoid rush hour if possible. 8–9am and 5–7pm are crowded. Early mornings or afternoons are better. Keep luggage close and don’t block doors.
- Which stations are wheelchair accessible?
- About 75 of 472 stations have elevators. The MTA website marks accessible stations. Call 311 for specific route information.
- How often do trains come?
- Peak hours: every 2–4 minutes. Off-peak: every 5–10 minutes. Late night: every 10–20 minutes. Use Google Maps for real-time predictions at your station.
- Do I need to tip drivers?
- No. MTA drivers are salaried city employees. Tipping is not expected.
- Can I bring my bike on the subway?
- Yes, but only outside peak hours (10am–3:30pm, 7pm onwards). No bikes 8–10am, 3:30–7pm, or 11pm–5am. Fold-up bikes allowed anytime.
Final Tips for Using the Subway Like a Local
The subway will feel intimidating the first time. New Yorkers have been doing this for decades. You’ll figure it out in a day. Download Google Maps offline, get a 7-Day pass, and move confidently. If you’re lost, ask a local. They’re usually friendlier than you expect.
The real move: on day one, take one easy ride just to practice. Pick the 1 or A line between two major stops. Do it twice. $5.80 is worth knowing you can navigate 472 stations without panic. After that, you’ll move through New York like you’ve lived here for years.
The subway is honest. It doesn’t pretend to be something it’s not. It’s crowded during rush hour, reliable when you need it, and faster than anything else the city offers. Learn to use it well, and New York becomes yours.
Ready to Explore New York?
- New York City Guide — Neighborhoods, food, where to stay, and what to do
- New York Attractions & Things to Do — Museums, landmarks, experiences, and day trips
- 2-Day New York Itinerary — Maximize your time with a structured plan